Electrolux's 
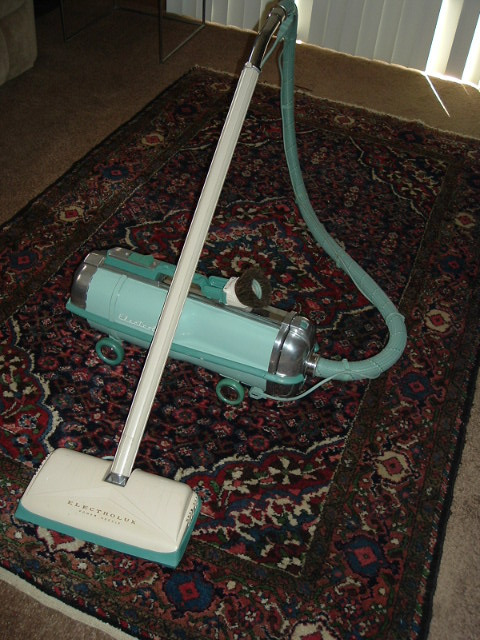
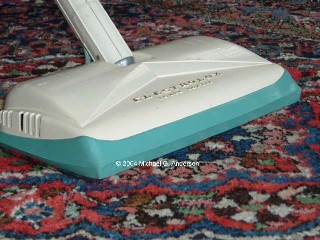
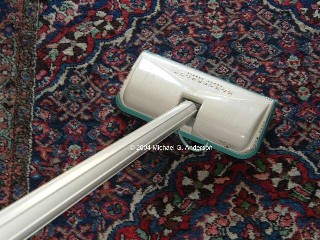
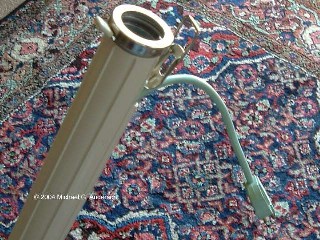
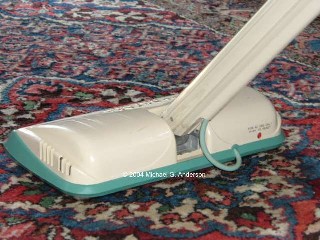
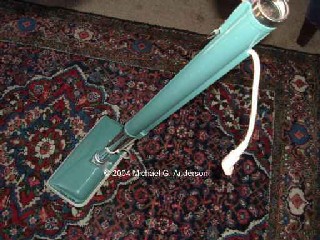
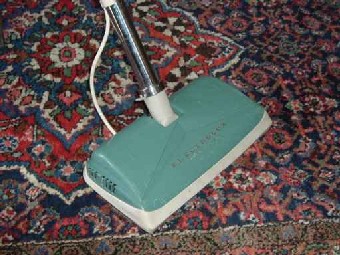
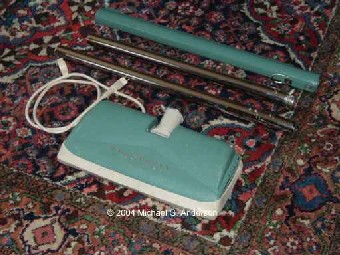
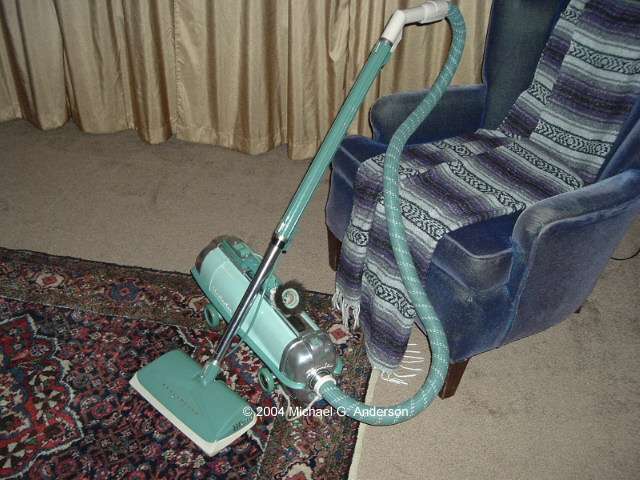
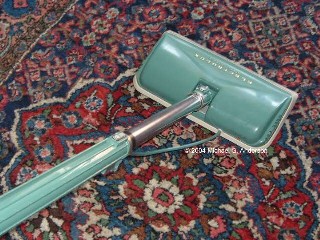
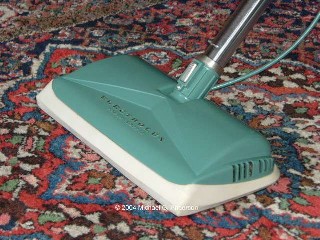
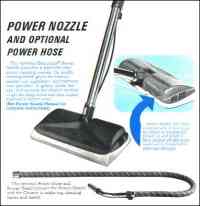
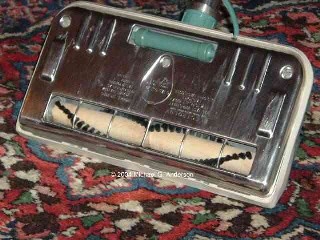
First Power Nozzle: The PN1

The power nozzle for Electrolux, which certainly gets credit for many great innovations, first appears in patents 3039129 and 3039130, invented by Michael E. Belicka [et al], filed in 1959 and awarded in 1962. You can view the patents at

http://patft.uspto.gov/netahtml/srchnum.htm

In the drawings the nozzle is shown directly attached to the front of a machine similar to the Model F. The nozzle looks just like the actual Power Nozzle #1 (PN1), complete with the very stylish chevron design.

Of note is how the nozzle connects to the cleaner. The drawings clearly show that the nozzle is removable, with a very short hose bent between the nozzle and the front of the vacuum. A handle is added to the back of the vacuum so you could push it around like an upright, though it probably would've handled something like very small and heavy pram.

Long after Electrolux had been bought out by Consolidated Foods, this idea returns and makes it to market as Electrolux's Discovery Upright in the 1980's. The major difference with the latter is that the canister vacuum is mounted to the handle vertically, instead of a handle attached to a horizontal vacuum.
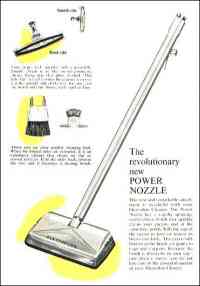


Above is my Model G with original PN1 and original hose with the power cord wrapped around it. This vacuum was bought at an on line auction for a total of $60 (including shipping) and is in mint condition inside and out.


While those patents were pending, Electrolux re-thought the power nozzle design and eventually moved it to the end of a hose, affording more maneuverability and greater flexibility. Almost. The very first power nozzle, in the same medium gray as the Model F it was offered with, had one very long extension cord attached to the nozzle that ran up the wand and all the way to the vacuum.

This arrangement prevented quick changes between the power nozzle and other cleaning accessories. Rather unfriendly, don't you think? Well, almost. To the engineers' credit, the cord was attached to the hose with simple plastic clips that could just snap on and off.


The familiar cord straps didn't show up until the 1962 Model G came out, when the cord was shortened to match the length of the hose, ending with a secondary socket and plug that let you disconnect it at the hose end. The color also changed to a very pretty cream with light turquoise trim and cord.

The first few years saw the PN1 as a one piece unit, with the nozzle, wand and cord as one unit that did not separate. The wand was entirely plastic - there was no metal wand within as with the later wands. This greatly reduced the weight of the nozzle and also reduced the strength as well. Many of these wands cracked or broke off entirely where it joined the nozzle's metal elbow.

At that time, canister vacuum floor nozzles had no way of standing up, and the PN1 was no exception. The elbow in the nozzle, while it did hinge up and down, could only be raised to the perfect angle for using it. It would be over a decade before it could stand up.

The one piece design also meant that the nozzle couldn't be stored in a chest or easily transported by a cleaning person. The wand did, however, include a ring on the end of the wand so it could hang from a hook in a closet.

Today, I have a PN1 circa 1962 that is in very good condition, having repaired the notorious crack at the elbow and receiving a bit of TLC. Once in a while I will take it out and use it around the house for my regular cleaning.

I do use it very carefully, as the wand seems a bit too flexible for the weight of the nozzle - perhaps due to age or perhaps that's the way it has always been. Note: Using the older style hose with the curved suction end really helps to strengthen the plastic wand. The shorter snouts of the newer suction ends may break your plastic wand.


A Few Changes to the Early PN1


The next change to the nozzle sees the introduction of a two piece steel wand with a plastic sheath on its upper section.

The nozzle still has one cord that reaches all the way up to the end of the wand, though the nozzle and wand can now be separated at the nozzle's elbow.

This was a better arrangement that added much needed strength to the wand and allowed the unit to be broken down for transportation.

The colors also get reversed, adopting the turquoise color of the Model G, with cream colored trim, elbow, and cord.


Reassembly of the unit was rather tricky, though. Having to slip the cord through the sheath and hold it there while the wands were slipped down into place may have proven too cumbersome for those on the go. Time for another makeover.

The fourth change comes with the addition of yet another plug and socket, this time half way down the sheath. This allowed the Power Nozzle to be completely removed from the wand without disassembling the wand itself.

A short section of cord stayed "fixed" in the sheath with a pigtail hanging out to connect with the hose. This edition of the PN1 had the same turquoise color, but the cream colored elbow and cord were changed to a dark turquoise. The bumper around the nozzle becomes more the more familiar grayish white.


The Last Change to the PN 1

Above is my Model G with the last edition PN1. I should point out that the hose shown in this picture is really just for looks. For, as with most of the old, electrified braided hoses, it has considerable suction loss and is rather stiff and unruly. I have a very nice brand new vinyl power hose for everyday cleaning, and because it's white - not gray - it doesn't look too bad with my Model G. 


While the electric hose still had a pig tail for connecting to the vacuum cleaner itself, the hose nozzle and new electric wand were endowed with the greatest (in my humble opinion) feature ever: a quick disconnect system that connected the power at the same time the wand was connected.

This made it really quick and easy to go from carpets to dusting to bare floors (with your combo floor tool already attached to additional standard wands, that is), without fumbling with dangling plugs and wires. Hooray!

This, the fifth and last edition of the PN1 also saw the experiment of the telescoping wand, a partial throwback to the first all plastic wand.

This wand has a metal lower section that could collapse into the upper plastic section for quick, easy, and compact storage and transport- It also meant that the wand lost a little bit of its strength as the upper section was not reinforced with a steel tube.


These wands also used a different method of clicking together. Instead of the usual compression ring and release tab seen on just about all of the earlier accessories, this system used a spring loaded clip that locked into a groove on the hose's nozzle- A feature that ended the trauma of the release tab pinch.

The instruction book I have illustrates a telescoping wand with several grooves on the lower portion for adjusting the over length of the wand. Oddly enough, the wand I have doesn't have these extra notches and locks in place only if all the way up or all the way down. My hunt for the adjustable telescoping wand is well underway, though.


This PN1 sticks around for some time, including the introduction of the radically designed Model 1205 in 1968. In 1970, the electrified hose is introduced along with one major improvement and an interesting new feature added to the PN1's wand.


Of all the power nozzles that I have come across, the PN1 is my favorite. Its simple and elegant design, quiet operation, and excellent balance make it the best power nozzle.

The only drawback is with edge cleaning. While the PN1's don't have any edge channels to draw dust away from walls, it has been my experience that the ones that do don't work as well as the designer's might have thought.


Caring for a PN1

The basic design of the PN1 includes three pieces that make up the housing. A plastic cover hides the motor, which is mounted on an aluminum platform, and the whole nozzle glides across the carpet on a chrome finished shoe.

The earlier versions of this nozzle have a "Large Object Clean-out"  in the center of the shoe that lets you remove clogs at the nozzle's elbow.


To open the PN1, make sure that it is unplugged and simply remove the three screws on the bottom. The back of the shoe lifts off, first hinging on the forward lip of the inner platform, as does the top cover (the bumper is attached to the top). Re-assembly is the reverse of these steps, making sure that the cord and the circuit breaker align with their respective holes in the top cover.

The very first thing to do is inspect the wiring inside. If you see any wires that are bare, or it appears that the insulation is cracking or otherwise damaged, please go no further until the wires have been replaced.  The most common problem with PN1 wiring occurs where they cross over the aluminum housing. There should be a small paper or plastic sleeve protecting the wires at this point.

If you need to replace the belt, you will find two screws on either side of the brush roll that hold it in place. These screws also hold a metal bearing cover that is needed to keep dust and dirt out of the housing. Please make a note of how these plates sit in their slots, you'll need to replace them later.

While you have your nozzle apart, you can use the vacuum to clean out any accumulated dirt and dust from around the motor and belt.  I usually use the blower port on my Model G and a crevice tool to first blow out any embedded fuzz.

Now is a good time to clean the brush roll. First carefully cut away any threads and hair wound around it with a sharp knife, trying not to cut into the wood or the bristles.  To clean the brush roll, I use mild dish soap in warm water, immersing it  completely and gently scrubbing it with a scotchbrite sponge. This is done with the brush roll removed from the nozzle- Do not immerse the power nozzle in water. A damp sponge or paper towel can be used to wipe down the aluminum platform if you must. Allow everything to completely dry before you re-assemble the nozzle. 


©2005 Michael G. Anderson | Terms Of Use | Webmaster